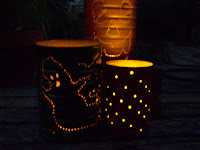
Friday, October 31, 2008

Happy Halloween!!


Yay! It's finally here....Halloween!! A word of advice, if anyone has really nifty decorations or pumpkins, I recommened taking them inside tonight, or putting them in the garage when you go to bed...better safe than sorry! Have a happy and safe Halloween everyone!

Sunday, October 26, 2008

Coming soon...

After Halloween, more new projects and delicious recipes....


Thursday, October 23, 2008

Mosaic Mushrooms


Who doesn't love a good mushroom ? Whether on a pizza, or hanging out in the garden with the gnomes. Here is the how to for these super nifty garden mushrooms! You can of course take this how to and tweak it, this is a pretty forgiving project. The measurements I've given are just a guideline and you can use whatever size pots, and saucers you want, given of course that they fit together! :)


For the small mushroom you will need-
  • -Two small Terra-Cotta pots, one inch and a 1/2 pot ( pretty tiny) and one 3 inch pot, for the stem.
  • -One 4 inch Terra Cotta saucer

For the medium mushroom you will need-
  • -One 5 and 1/2 inch pot for the stem
  • -Two saucers, one 7 and 1/2 inch and a 4 inch.

For the large mushroom you will need-
  • -Two pots for the stem, one 5 and 1/2 inch pot and one 3 and 1/2 inch pot.
  • -Two saucers for the top, one 10 inch, and one 5 and 1/2 inch.

Other materials needed:
  • -Flat marbles in color of your choice (they usually come in mesh bags, found at any craft store)
  • -You can use polished pebbles (also in mesh bags at the craft store), or more flat marbles to cover the mushroom cap surface.
  • -Acrylic paint in shades of tan or creme
  • -Paint brush and sponge
  • -Ceramic Tile Adhesive and Caulk in white
  • -Clear Acrylic Gloss (or matte), water-resistant spray coat.
  • -Grout is optional, I didn't use it but if you prefer that look go ahead and use it.

--------------------------------------------------
Assembly-
Here is where the fun begins! Like I said this project is very forgiving so don't be afraid to use different sized pots than the ones I used, and different colored marbles or stones.

Step 1.) For the two larger mushrooms that have two saucers put together for the top. Flip the smaller saucer over so that the bottom is facing up and stack that on top of the larger saucer, which should also have the bottom facing up..they should resemble a mushroom cap when placed together. Then use the Ceramic Tile Adhesive to affix the smaller saucer on top of the larger saucer, let these dry for 24 hours.

Step 2.) For the small mushroom and the large one that have more than one pot stacked together for the stem, do the same thing as in step one. Using the tile adhesive, glue the smaller pot on top of the larger pot (just like you were stacking them ) and let dry for 24 hours.

Step 3.) After base pots dry for 24hrs, paint the mushroom "stems", with acrylic paint. I used a tan base coat, let that dry then applied a lighter creme or tan color, and using a dry sponge dragged it down the sides for a layered effect, it makes it look more like a real mushroom stem. Let paint dry.


Step 4.) After paint is fully dry, using tile adhesive affix the mushroom tops to their bases with a liberal amount of adhesive, let dry 24hrs again.

Step 5.) Now using the tile adhesive again, or a heavy duty glue, begin applying the flat marbles on to the top of the "mushroom caps", and down the sides, in whatever pattern or colors you wish. When you begin affixing the marbles and pebbles to the sides of the saucers, they might slide a little so sometimes you have to hold each marble or pebble in place for a few seconds until it sticks by itself. Let dry for 24 hrs again.


Step 6.) If you plan on putting your mushrooms outside spray them using a water resistant clear gloss, or matte spray.

It is a fair bit of work but when you are done you'll have a lovely set of mushrooms for your garden or home!

Wednesday, October 22, 2008

Yes We Carve!

I am in no way shy about my support for presidential candidate Barack Obama and VP Joe Biden. So I was very excited when I found out about this website that offers free patterns to carve your own Obama pumpkin! It is definitely worth a look, and if you love carving pumpkins as much as I do, you'll have to devote at least one pumpkin on Halloween to this unique form of support!


Monday, October 20, 2008

SilverCrow Creations

I am definitely not someone you would find wandering around a Wal-Mart, and while I do still occasionally shop at places like Target I try to limit my big box store spending as much as I can on my budget. I have a great love for independent stores, especially ones that sell quirky and one of a kind goods. I have found in the past couple of years that there are some great web stores out there that offer unique products, and SilverCrow Creations is one of those web stores. Loaded with just about anything and everything a person could dream of, they have an awesome bead and charm selection, actual vintage goods, a variety of rubber stamps you won't find anywhere else, and tons of cute and unique gift ideas. I absolutely love shopping on SilverCrow and love that each of my receipts I've received has a hand signed Thank You. So I encourage you to check them out, I promise you won't be sorry you did. SilverCrow has a lot to offer in the way of unique Halloween goodies and Day of the Day too! ..as seen below..


I know I've been slow getting projects and recipes posted, but I've been working hard on some new projects and I have several great projects to post this week, so stay tuned!

Saturday, October 18, 2008

Halloween costumes part 2

Here is another simple costume idea that I wish I had pictures of, sorry people! But I'm sure you can use your imagination right ? Seeing as there is not much interest in the costumes I'm only going to post one. If anybody tries any of the costumes I'd love to hear how you did it, and if you changed it anything, and send me a picture and I'll post it! Same rating system from costumes part 1, I will give each costume a number between one and five, one is super simple and five takes a little bit more effort.

LadyBug:3
-headband
- black chenille stems(pipe cleaners)
-black pom-poms
-a hot glue gun or craft strength glue
-red shirt, sweatshirt, jacket
-black felt or fabric
-glue, hot glue gun
-usual sewing supplies
--Optional: Black pants

I was actually a ladybug one year when I was a kid, although my costume was made by my Mom and was much fancier than this. The part of this costume that will take the most work is the headband, I suggest starting with a black headband but if it's not you can always wrap it with black ribbon and glue it down with a hot glue gun. Take the two black chenille stems and wrap each one around the head band at least once and glue them into place so they don't move around. Let that dry. After the glue dries take the two black pom-pom's and glue them onto the tips of the chenille stems, and let them dry. Now with your black fabric/felt trace two circles (or however many dots you want) using a cereal bowl as a template and a white pencil or tailor's chalk. Cut out the circles and sew, or glue them onto the back of your red shirt or sweatshirt, and you have a simple ladybug costume!

Friday, October 17, 2008

Angriest Pincushion around...

Since I posted my little pincushion friend several weeks ago now, I have had several inquiries about his existence, and it has been brought into question whether I created it or not, and yes I did. The only thing I didn't create was the pincushion itself, that was bought at a fabric store. With my limited resources I photographed the cushion with a semi-crappy digital camera, and some special lighting (a really big flashlight) to get some better contrast without drowning the image out with my camera flash. Mr. Cushion's face came from my imagination onto a piece of paper where I then painstakingly cut it out using tiny manicure scissors, glued it on to the pincushion and then as an after thought I added the speech bubble above his head (taped to a pin). Throw in a couple of vintage wooden thread bobbins and I call it good, cute, brilliant...whatever.

Now as for the idea of the Angry Pincushion, I can't really pinpoint (haha, oh please) where it came from. Like most of my weird ideas they just pop into my head, which is why I always carry a pad of paper with me to write down ideas before I forget them. The original name I had chosen for my blog was taken, as I found out when I was signing up for Blogger, so I came up with this The Angry Pincushion, and I'm glad the first name I chose was taken, because this one is much better! Have a great weekend everyone, I promise there will be new projects next week!

Martha does Halloween


To those of you who hate Martha Stewart, look away! I happen to love Martha, okay maybe I don't love her personally, but I love the people who come up with her super creative and amazing craft projects, and delicious recipes. One of the things Martha does really well is Halloween, and I think her book of Halloween projects is one of the best holiday how-to books of all time. It has great decorating and party ideas, creative costume and face painting how to's, and recipes that are as yummy as they are ghoulish. I highly recommend it to my fellow fall/Halloween lovers, especially if you are throwing a Halloween party. I am strongly encouraging you to stop by the library and check it out, pick it up at your local bookstore, or buy it from Amazon, I can assure you, you will not be disappointed!

Thursday, October 16, 2008

On the lookout for...

... like minded peoples who would like to share their ideas, pictures, recipes, and step by step projects. I would also love to hear your feedback on this blog, or my projects, recipes whatever. Nothing mean, or rude please, us crafty types are sensitive people. If you try something from this blog I would really like to know how it turned out, send pictures if you can. If you are an entrepreneur and would like your creations, web store, or your etsy shop showcased, drop me an e-mail please!! My e-mail address is sproutedwings@gmail.com. I look forward to hearing from you :)

Wednesday, October 15, 2008

Easy Halloween costumes part 1

Yesterday I sat down with a pad of paper and a pencil and came up with some ideas for for exceptionally easy to make and low cost costumes Now I'm usually the type that likes extravagant, detailed Halloween costumes, that take hours upon hours of labor. Unfortunately at the moment I neither have the funds or quite the skill of my Mother (she has made all of my extravagant costumes ) to have such a luxury. So I've come up with a few ideas . I wish I had some pictures of these but for now a description will have to do. I've devised a little ranking system to help you out. By every costume description I will give it a number between one and five, one is super simple and five takes a little bit more effort. I'll post more ideas this Saturday.

M&M: 3
-So you'll need a candy colored shirt, sweatshirt, jacket.
-A piece of white felt or fabric, a sewing needle and white thread, or sewing machine of course.
-Scissors, pins the usual sewing things.
--Optional: candy colored face paint and hat.

Who doesn't love this candy! This is both great for kids and adults. If you have a candy colored shirt, hoodie or coat you don't mind sewing an M onto this will be a cinch. If you do not already have a plain shirt/sweatshirt you can find plain tees and such at just about any craft store for pretty cheap. Of course M&M colors are Red, Blue, Green, Brown, Yellow, and Orange. Find a template or stencil for an M&M looking M, or just look at the candies and freehand it onto a white piece of paper, cut it out. pin it onto the white fabric or felt and cut out your M to be stitched on your shirt. Then sew the M onto your shirt, by hand or on a machine. To finish the look you could paint your face, and wear a baseball cap the same color as your shirt, if you wish.

Presidential Candidate: 1
- Suit, dress shirt, tie, or a power suit ladies! Dress shoes.
-A Presidential smile!
--Optional: flag lapel pin

This is a good one since the election is just a couple of days after Halloween. I think this would be an adorable kids costume as well as a humorous adult costume.


Pillar of Salt: 1
-White sheet
-scissors

Okay, this one might sound a little weird but I once got an award for this one when I was a kid at a church Halloween party for stumping the minister. Can you guess what famous pillar of salt I might have been ? Lot's wife in the bible is turned to a pillar of salt upon looking back at the cities of Sodom and Gomorrah being destroyed by God (Genesis). If you do happen to have a church going's on for Halloween this will be great. You can cut a hole, or a slit for the eyes so you can see, if this is going to be worn all night.

Monday, October 13, 2008

Bestest Spinach Artichoke dip ever...

After eating my friend Kim's Spinach Artichoke dip at a party a couple of years back I was in love and had to have the recipe! It's great party food, and simple to make. So here it is thanks to Ms. Kim!

You'll need-

1 16 ounce tub of lite sour cream
1 16 ounce tub of whipped cream cheese
1 block frozen spinach (usually 10 ounces)
1 can artichoke hearts
1 packet dehydrated vegetable soup mix
1 tsp. lemon juice (optional)
Shredded Colby Jack cheese or Cheddar

Rinse spinach until no longer frozen. Drain artichokes and chop in small pieces. Mix all ingredients but the cheese together in a large oven-safe bowl. Sprinkle top with shredded cheese and bake at 350 degrees for about 20 minutes, or until cheese on top is melted.

Or, you can put the mixture in a bread bowl and bake at 425 degrees until the bread is crusty and the dip is warm.

Friday, October 10, 2008

Fellow Knitters and Crocheters!

If you're like me you love to knit, (I have not quite mastered crocheting yet!), and now is the perfect season to get out your yarn and needles and start some new fall projects! I was recently on Lion Brand Yarn's website and found they had 46 free Halloween knitting and crocheting projects. They are incredibly cute and you can't beat the price: free! Thanks Lion Brand!
Click here to go to Lion Brand's free Halloween patterns!

Thursday, October 9, 2008

Crispy Halloween treats!

This is a recipe and how-to for Halloween tortilla crisps. They are very inexpensive, fun, and easy to make, not to mention very yummy! This recipe calls for:

-10 six inch flour tortillas
-1/4 cup melted butter
-1/2 cup sugar
-1/2 teaspoon cinnamon
-a cookie sheet ( I used more than one)
-cookie cutters in Halloween shapes, or a template traced onto wax paper, cut out the pattern and use kitchen scissors to cut out the shapes from the tortillas.

- Heat oven to 350 degrees. Melt butter, put into bowl with basting brush. Mix cinnamon and sugar together, put into a bowl.

Using cookie cutters, or a template begin cutting your shapes out of the tortilla's, depending on the size of your cookie cutter you should be able to get several out of one tortilla. You can use the scraps too, they won't be as pretty but they'll taste as good!


After shapes are cut out, brush melted butter onto both sides, then sprinkle one side with cinnamon sugar mixture. I recommend doing this on a cooling rack over a plate, it's less messy and you can reuse the cinnamon sugar that falls onto the plate.


Place shapes onto cookie sheet(s) and bake for 8-10 minutes. Cool for about 15 minutes. Give them away as a Halloween treat to family and friends, or keep them for yourself to enjoy!

Wednesday, October 8, 2008

Halloween Lanterns


These are Halloween lanterns, or luminaries some call them, made out of soup cans and coffee cans...if you can find any tin coffee cans since they're gone to plastic. They look great out among the Jack-o-Lanterns on All Hallow's Eve, lining the walkway to your house, or even in a window. You'll have to excuse my poor excuse for a picture, but I don't have the best digital camera. For my lanterns I used one small, I suppose you'd call it standard size soup can, and two larger, coffee cans. You will also need a hammer, an awl, a towel or bag of rice, and spray paint or oil-based enamel paint. Here's the how to-


1. Start by taking the label off the empty can and cleaning it out well.

2. This is the time to draw a pattern on the can if you wish with a marker, or you can freehand it later.

3. Fill can with water and and put in the freezer to well... freeze! This is so the can is easier to work with and won't collapse while you are punching it full of holes.

4. After a day or so, ( I think mine took about that long to completely freeze) take can out of the freezer , steady the can on a towel, or a bag of rice, and begin punching holes in the can with the hammer and awl.

5. After you are finished place the can in the sink, let the ice melt and the water drain out. Dry the can.

6. Paint the outside of the can if you wish with spray paint or oil-based enamel paint, I chose to use spray paint for mine. If the holes in the can get blocked with paint, clear those holes with a toothpick while the paint is still wet. I painted the inside of my cans yellow as well to help reflect the light from the candles inside.

7. Add a candle, or those new battery operated flame less candles and enjoy your new Halloween lanterns!

Tuesday, October 7, 2008

Domokun invades! Plus coming attractions...


Finally after spending years in Japan Domokun has finally made it big in the states! I have been a fan for a couple of years but it was hard to find anything Domo related in the U.S until recently when Target started selling school goods featuring the friendly brown creature. Now Target is using Domokun as their new spokesman for their Halloween line, that makes me happy! Coming tomorrow a great Halloween inspired project. If I had to give a hint I'd say it will get glowing reviews...stay tuned.

Saturday, October 4, 2008

A tribute to Paul Newman


In case you had not heard, which might mean you are cut off from the world entirely, Paul Newman died last weekend of lung cancer, he was 83. Paul Newman was more than just a pretty face and a great actor. His co-owned food company Newman's Own donated over 220 million dollars to charity as of 2006, and in 1988 he co-founded The Hole in the Wall Gang Camp, a summer camp for seriously ill children. The camp serves 13,000 children a year, all free of charge. Newman was also a founder of the Committee Encouraging Corporate Philanthropy (CECP), an organization of over 175 CEOs and corporate chairpersons determined to raise the level and quality of global corporate philanthropy.

I have always admired Paul Newman, for many reasons, but one thing in particular will always stick in my mind. In an age of Hollywood hookups, scandals, and affairs, it was refreshing to read a quote from Newman from Playboy, when asked if he was ever tempted to stray from his wife Joanne Woodward he replied "I have steak at home, why go out for hamburger?". Paul Newman was many things, he was an actor, a humanitarian, a political activist, and an environmentalist, he was a man we should all strive to be more like. A man who cared for his fellow human beings, animals, and the environment and gave freely to their causes. He will be much missed and my heart goes out to his family and friends.

Friday, October 3, 2008

Spanish Coffee Cake

Here is a quick recipe for Spanish Coffee Cake, I've been baking it since I was in grade school. It's the perfect breakfast for cool fall mornings, and it is simple to make. This recipe is from my great aunt. You will need the below ingredients and an 8 x12 pan, plus the usual measuring cups, spoons and cooking utensils.

-2 and a half cups sifted flour
-1 cup brown sugar
-3/4 cup white sugar
-1 tsp. cinnamon
-1 tsp. salt
-1 tsp. nutmeg
-3/4 cup vegetable oil
Mix all these ingredients throughly, then remove 3/4 of a cup for the topping, set aside.
With the remaining ingredients add:
-1 tsp. baking soda
-1 tsp. baking powder
-1 egg
-1 cup sour milk ( mix1 tablespoon vinegar or lemon juice with milk to sour it.) ((I don't recommend using the milk that has been sitting in the back of your fridge for a month! ))
Mix all ingredients together, beat for several minutes. Pour into pan, sprinkle topping that has been set aside on top and bake at 350 degrees for 35 minutes.

Thursday, October 2, 2008

Happy Birthday to me!


Happy Birthday to me, happy birthday to me! Today, October 2nd is my 25th b-day. Now I'm not quite sure how to feel after my Mother told me 25 is a special milestone birthday, "afterall, you're going to be a quarter of a century old!" Thanks Mom, now I feel old. Tomorrow I plan on posting my first project here, I promise it will be a good one, I'm hoping at least one of my two readers will enjoy it.